FREE Tracked 48 Delivery on orders over £25
 Upgrade to 24 Hour Tracked Delivery
Grow Your Own From Seed
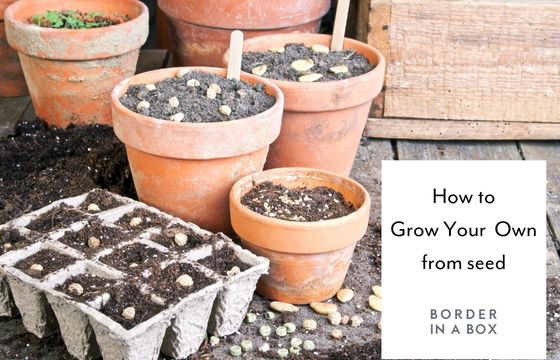
Grow Your Own from seed is one of the most cost effective ways of creating a flower garden. However, if you’ve not done it before, it can feel daunting, but here are my top tips for sowing and growing success. It’s like anything, it takes time and patience to learn any new skill, but please have a go as practice makes perfect!
I find nurturing seeds very therapeutic and good for my wellbeing as I completely switch off from anything else going on around me – so I recommend ‘growing your own’ for the mindfulness aspect too.
Equipment needed:
- Seed trays ideally with a clear lid
- Seed compost (this doesn’t contain any nutrients compared to multi-purpose compost) peat free varieties
- Plant marker and pen
- Trowel
- Wooden batten
- Tamp
- water
- Tray to put the seed trays onto for watering purposes
I appreciate this might sound like a lot of ‘kit’ but it can be done on a shoe-string budget by re-using egg boxes or yoghurt pots (please make sure there’s holes in the base for water to drain out of). Use a tea tray to stand the pots in so you can water them easily. If you don’t have compost, you can start your seeds using a damp paper towel. The seeds can be germinated on a warm, bright windowsill so there’s no need for greenhouses etc.

Please note: Follow the seed packet instructions as you may have a seed that needs specific germination. Also its advisable to sow your seeds during the first year of purchase and sow them at the right time.
But as a general rule, here’s how to sow.
Indoor sowings

- Fill a clean seed tray or module with seed compost to the top.
- Scrape the wooden batten across the top of the seed tray, using a sawing action, to remove excess compost and provide a level surface. If the compost is lumpy it’s best to sieve it beforehand (garden sieves are readily available from garden or hardware shops) – as per the photo above.
- Gently tap the whole tray against the bench to remove air pockets.
- Once filled, stand the tray or pot in water until the compost is damp.
- Sow the seeds finely across the surface of the damp compost – ensure there is space around each seed if possible although some seeds are so tiny it’s difficult to tell.
- Add a thin layer of vermiculite and/or perlite over the top if you have it. This helps with minimising the growth of moss and algae (It is a natural, water-retaining product you can buy from the garden centre and when mixed in with the compost it helps with drainage). Or use sieved compost to lightly cover the seeds. Make sure the seed has contact with the compost – use a tamp for this and gently tap down.
- Label the seed tray with the seed name and the date.

Seedlings potted on – mixture of cosmos, lupins & calendula
If you have a clear plastic bag or a lid that comes with the seed tray, place it over the seeds and place in a warm, light place. Around 16-18 degrees and in a bright spot but out of direct sunlight. If you place them on a windowsill to germinate during winter months, remove to a warmer area overnight as the windowsill can get really cold when there’s no heating.
Seeds will generally germinate in 7-28 days (each seed varies). Don’t over water them – keep the compost from drying out, but don’t allow the tray to sit in water.
Water from below, this helps minimise damping off (a fungal disease that looks like fluffy mould) and stops the seed from moving around and prevents the seedlings from getting knocked over by the water.
Pricking out & potting on
- When the seedlings have grown – around 3-5cm tall, you will need to prick them out and pot them on into larger pots. Use a multi-purpose compost – this may have more nutrients included in the mix compared to a seed compost which has no nutrients.
- Try not to touch the stems as they’re really fragile, hold by the leaf instead (gently). I use my ‘widger’ (available from my shop) to help de-tangle the roots and make a hole in the new pot of compost.
- Gently press down to ensure the seedling is firm in the new pot. Water in and keep them warm and out of direct sun.
Plant out in the garden once frosts have gone – usually May timeframe.
You may have heard of the ‘two true leaves’ terminology and that it’s best to pot on at that point. All that means is the set of leaves after the initial germination leaves – here’s a photo to explain what I mean

Tomato seedling just germinated with two leaves

There are two tomato seedlings in this coir pellet, both have two true leaves.
remove the weaker seedling before potting on.
Sowing direct outdoors
If you wish to sow directly outdoors into the garden, make sure it’s into a prepared seed bed (this means all weeds, stones and lumpy soil has been removed and raked over to make it look like breadcrumbs). Water the soil, then finely sow the seeds. Add a thin layer of soil/compost, and gently tamp down. You may need to thin the seedlings by removing some of them to ensure there’s enough light and nutrients available.
It’s likely you will have more seedlings than you need, so why not share them with your friends and neighbours!
Join our Garden Lovers Club and receive a free weekly newsletter filled with ideas, tips, plants, colour and the love of nature – click the link below…